How to Use a Map and Compass on UK Trails: A Beginner's Navigation Guide
Mobile phones are excellent navigators right up until the battery dies, the screen gets soaked, or the signal vanishes in a steep-sided valley. A paper map and a baseplate compass never run out of power, and learning to use them properly is one of the most satisfying skills in hillwalking. It turns a day out from following someone else into something you can plan, lead and repeat. You don't need to be a cartographer. You need an hour on a familiar hillside and a handful of simple routines.
What Each Tool Actually Does
Most UK hillwalkers carry an Ordnance Survey map. The Explorer series at 1:25,000 shows walls, fences, streams, crags and field boundaries in useful detail, which is exactly what you want when you're picking your way across open moorland. The Landranger series at 1:50,000 covers more ground per sheet and is fine for long routes on clear paths. Whichever you choose, keep it in a plastic map case — a wet map that tears along its folds is worse than no map at all.
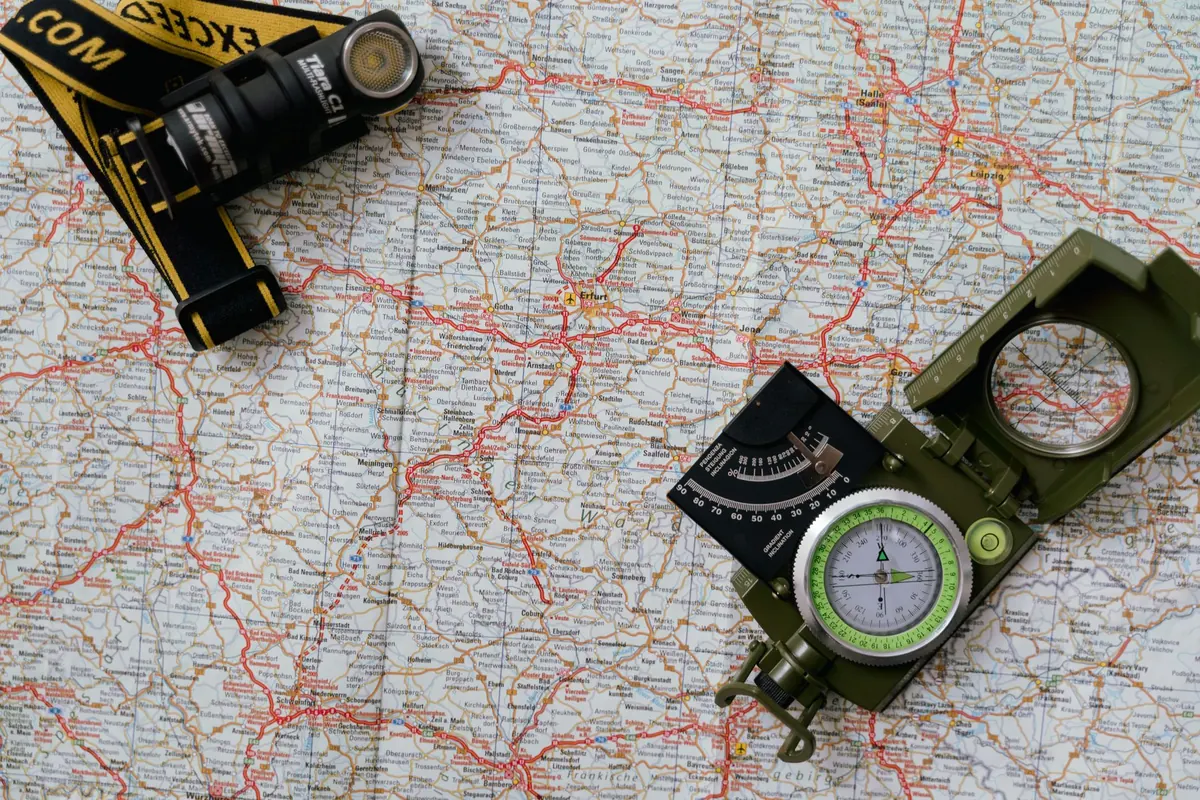
A baseplate compass is a simple instrument with a few parts worth naming before you use it. The baseplate is the clear rectangle. The direction of travel arrow points where you're heading. The bezel is the rotating housing, marked with degrees and the orienting lines. Inside it sits the orienting arrow, and floating above that is the magnetic needle, with its red end pointing to magnetic north. The index line at the top of the housing is where you read your bearing. Most baseplates also carry romer scales for measuring grid references.
One warning: the needle is sensitive. Phones, magnetic phone cases, some watch straps and clips with magnetic catches will drag it off north. Keep the compass a good arm's length from anything like that when you take a reading.
Setting the Map, Then Finding Your Square
Before you read anything, set the map — that is, turn it until it lines up with the ground. The quickest way is with the compass. Turn the bezel so that N sits at the index line. Lay the compass flat on the map with the direction of travel arrow pointing to the top of the sheet. Now rotate the whole map and compass together, keeping them flat, until the red needle settles inside the orienting arrow. Your map is now aligned: a wall running away to your left on the ground runs away to your left on the paper.
You can also set a map by eye. Find two features you can identify — a church tower, a distinctive bend in a river, a trig pillar — and rotate the map until the line between them matches what you see.
Grid references: along the corridor, then up the stairs
Grid squares on a UK map are one kilometre across. A four-figure reference identifies one of those squares; a six-figure reference narrows it to 100 metres, which is what you'd give a mountain rescue team or a friend meeting you on a path.
- Read the easting first — the vertical line on the left of your square. The numbers run along the top and bottom of the map, left to right. Think "along the corridor".
- Then read the northing — the horizontal line below your square, numbered up the sides. Think "up the stairs".
- For a six-figure version, imagine each square divided into ten along both edges and estimate where your point sits within it. The romer scale on your compass baseplate does this for you.
So a bothy sitting just under grid line 68 and just east of line 23 might be 684233 — square 68/23, then a further eight tenths across and three tenths up. Write it down before you set off.
Taking a Bearing and Walking On It
A bearing is simply a direction expressed as a number of degrees. Taking one from the map takes about twenty seconds.
- Lay the compass on the map with one long edge running from your position to your destination, direction of travel arrow pointing at the destination.
- Hold the compass steady and rotate the bezel until the orienting lines inside the housing run parallel with the vertical grid lines on the map, with the orienting arrow pointing to the top of the sheet. Ignore the needle while you do this.
- Read the number at the index line. That's your grid bearing — say 236°.
- Convert it to a magnetic bearing using the information printed in the map margin. Magnetic variation in Britain is small at present, but the margin gives you the figure and the annual change, and tells you whether to add or subtract. Do it properly; ignoring it can put you off line over a long leg.
- To follow the bearing, hold the compass flat in front of you, level and still, and turn your whole body until the red end of the needle sits neatly inside the orienting arrow.
- Look up along the direction of travel arrow and pick out a feature on that line — a boulder, a lone tree, a break in a wall. Walk to it, then repeat the process.
In mist or darkness, trust the compass over your instincts. Almost everyone drifts to one side when walking blind, and the drift is usually to the right. Walk on the bearing in short legs, checking often rather than striding confidently in the wrong direction.
Pacing, Timing and Knowing How Far You've Come
Bearings tell you which way; pacing tells you how far. Count double paces — every time your left foot lands, or your right, but pick one and stay consistent. Measure your own count on a known 100-metre stretch of flat ground. Most adults need somewhere around 60 to 70 double paces, but uphill, in bog, or with a heavy pack your stride shortens sharply, so measure on the flat and adjust as the ground changes.
Timing works alongside it. A common rough rule is about 4 km/h on level ground, plus a minute for every 10 metres of ascent, adjusted for terrain and how fit you're feeling. Combine the two and you can estimate where you should be on a leg, then check the map for features that confirm it.
Learn three techniques and your navigation gets much safer. A handrail is a linear feature — a wall, a stream, a ridge — that you follow towards your target instead of walking on a bearing. A catching feature is something beyond your target, like a road or a loch, that will stop you overshooting. Aiming off means deliberately heading for a point to one side of your target, so that when you hit the feature you know exactly which way to turn.
Habits That Keep You Found
- Set the map every time you stop, and say your six-figure grid reference out loud.
- Tick off features as you pass them: the gate, the burn crossing, the ruined sheepfold.
- Fold the map so only the section you need is showing, and keep it in a case.
- Keep the compass on a lanyard round your neck, away from magnets and electronics.
- If you're unsure, stop. Eating something while you work out where you are beats walking on and hoping.
- Leave your route and expected return time with someone at home, and carry the kit to spend an unplanned night out.
Practise Where Getting Lost Is Cheap
Start in a local park or on a low, familiar hill. Set the map, take a bearing to a bench or a gate, pace 200 metres, and walk to it. Then try the same leg in mist, or at dusk with a torch. When that feels easy, plan a short circular route on open country you know reasonably well and lead it yourself, checking off features as you go.
Navigation is a perishable skill — two hours of practice every few months will keep it sharp. If you're heading into remote terrain for the first time, a local navigation course or a day out with an experienced walker is money well spent, and it will make every hill day afterwards feel calmer and considerably more interesting.
Photo: Tima Miroshnichenko / Pexels

Three Days on the West Highland Way: Trip Report and Packing Tips
A three-day fastpack of the West Highland Way, with notes on where the pace fell apart and which kit...

A Winter Ascent of Snowdon: Trip Report and Lessons Learnt
A cold, clear winter day on Yr Wyddfa via the Llanberis Path, with the kit that earned its place and the...
About Us